Can you believe it is already 2014?? I can’t believe 2013 is over…it was a huge and exciting year in my life and I am sort of sad to see it go. J and I got engaged, married, bought a house and got a dog all in 2013. For us, that is a whole lot of change and exciting stuff for one year!
Since I was off work yesterday, I decided to end the year with one of my favorite activities…an at home manicure! I pay for maybe 2 manicures a year – I love getting a manicure, but I feel like I do a pretty good job myself and I get so frustrated when I screw up a manicure within 24 hours that I paid $30+ for.
One day while browsing on Pinterest, I found directions for an at home gel manicure so I thought I would give it a try. I modified the directions a little based on some other tips I’ve found.
Here is what you will need:

-coconut oil
-white vinegar
-Sally Hansen Hard as Wraps
-Your favorite nail color
-Sally Hansen acrylic top coat
-cotton balls/Q-tips
All items except the coconut oil and vinegar were purchased at ULTA. I have an obsession with ULTA and try to buy all of my beauty products there because they have a really good member rewards programs that gives you money off future purchases. They didn’t pay me to say all this, but if they did I’d probably be plotting my future purchases from them. I am a dangerous girl in that store!
Ok, let’s do this!
1. Start by prepping your nails. I push back the cuticles, trim them, and then file my nails. Here is the before picture, nails already prepped and ready to go:

2. Next, moisturize! The best thing about a manicure to me is the hand massage with lotion. Since you can’t really give yourself a hand massage, this is the next best thing! Grab a little dab of coconut oil and rub into your hands. It melts really quickly and will become easy to rub into your skin. I think I used a little too much so I lighted rinsed my hands in the kitchen sink and then patted my palms dry so I could open the polish bottles. This is also a great treatment to do before bed to maintain good moisture, plus it smells like dessert…yum! Here are some pics:


3. Now we will need to make sure the nails aren’t greasy from the oil and are residue free. Take a cotton ball and dab it into some vinegar. Wipe each nail with the vinegar to clean off the coconut oil.
4. Apply 1 coat of the Hard as Wraps to each nail. It can be used as a base coat or on its own to help strengthen nails. I think clear shiny nails look pretty!

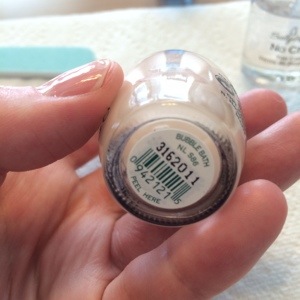
5. Now is the fun part! Make sure the Hard as Wraps is completely dry before adding two coats of your favorite color. Since J and I were going to a wedding and my toes were already painted red I thought I would use one of my favorite standby colors: “Bubble Bath” by OPI. (My ultimate favorite go-to color is “Sugar Daddy” by Essie.) Apply two coats making sure each coat is dry before applying the next.


6. Wait for the OPI coats to dry and then apply a layer of the Acrylic top coat.
7. Since I had to start working on my hair and makeup for the wedding I let the top coat dry for about 2 minutes and then used the salon drying spray. I’m sure it isn’t good for you, so I am not planning on using for every manicure, but when you’re in a pinch it is nice to have around. I went out into the garage and sprayed it on my nails about 8-10 inches from my hands.
Ta-da! They’re dry and ready to party on New Year’s Eve! I’ll follow up with how they hold up, but even after 24 hours they still look perfect.

Do you have any nail tips or tricks that help you create the perfect mani at home?
H A P P Y N E W Y E A R ! I wish you the best for a cheerful 2014!
xo SM
